
JAVA Developer Training
커맨드 패턴 ( Command Pattern ) 본문
커맨드 패턴
커맨드 패턴은 이벤트가 발생했을 시 실행될 기능들의 변경이 필요한 경우 이벤트를 발생시키는 클래스를 변경하지않고 재사용 하고자 할 때 유용하다 , 실행될 기능들을 캡슐화함으로써 주어진 여러 기능을 실행할 수 있는 재사용성이 높은 클래스를 설계하는 패턴이다.
커맨드를 추가하고 난 다음 Receiver(수신자), Invoker(발동자) 클래스만 수정하기만 하면 바로 추가된 커맨드를 사용할 수 있다.
*Receiver = 행동을 담당하는 객체 = 기능을 수행하는 객체
Invoker = 커맨드를 저장하는 객체 - 버튼이 어떤 수행을 할 것인지 결정
쉽게말해 실행된 이벤트(요청)들을 객체로 감싸서 관리한다는 말
사용 이유
다른 시간에 요청을 작성하고 실행해야할때나 롤백,로깅, *트랜잭션 기능을 지원할때 사용하면 편하다
*트랜잭션이란 데이터베이스의 상태를 변화시키기 위해서 수행하는 작업의 단위를 뜻한다
간단히 말해 SQL문을 이용하여 DB에 접근하는 것을 말한다
SELECT / INSERT / DELETE / UPDATE
단, 작업의 단위는 질의어 한문장이 아니라는 것을 상기해야한다
- EX) SELECT * FROM STUDENT
*작업단위는 많은 질의어 명령문들을 사람이 정하는 기준에 따라 정하는 것을 의미한다
한문장이 아닌 경우를 들어보자면 게시판 사용시
게시글 작성 -> 게시글 올리기 - > 이후 게시판을 보았을때 업데이트 된 게시판 보기
즉 , INSERT + SELECT 두가지 과정을 합친것이 하나의 작업단위가 된다.
장점
- 기존 클래스는 그대로 유지되기 때문에 새명령(요청)을 쉽게 추가할 수 있다.
- 조작을 호출하는 객체와 실제로 조작을 수행하는 객체 를 분리한다
- 즉, 명령의 호출자와 수신자 간의 의존성을 없앤다
- 요청내역을 큐에 저장하면 스레드 작업에 유용하다
단점
- 명령에 대한 각각의 클래스는 많아져 복잡해 질 것이다.
예시
커맨드 패턴을 이해하기 쉽게 예시를 하나들어보자
우리가 음식점에 갔을때를 생각해보면 간단하다.
홀 아르바이트생이 와서 우리가 원하는 주문을 받아적는다. 예를들어
후라이드 치킨과, 양념치킨, 간장치킨과 콜라를 주문했다고 치자 그렇다면 아르바이트생은 포스기에 가서 작성할 것이다. 후라이드 치킨-1 , 양념치킨-1, 간장치킨-1, 콜라-1
입력한 데이터를 그대로 주문지로 뽑아 주방으로 전달 할 것이다.(수기로 주던 주방에서 프린트가 되어 나오던)
주방장은 주문지를 보고 요리를 만들 것이다.
위 예시에서 주문지는 받은 주문을 일종의 캡슐화 했다고 보면된다.
아르바이트생은 주문서의 내용을 사실 몰라도 된다. 손님들이 임의로 작성하여 그대로 주방장에게 주어도 무방하다는 뜻이다 . 왜냐? 이미 주문지에 다 적혀 있기 때문이다.
주방장은 손님이 누구인지 알필요도 없으며 손님또한 누가 음식을 만드는지 알필요가 없다.
요리 하는 방법은 주방장이 알고 있으며 해당 주문지에 손님들의 주문 요리가 있으니 문제가 없다는 말이다.
이 예제를 커맨드 패턴에 대입하면 아래와 같을 것이다.
| 식당 주문 시스템 | 커맨드 패턴 |
| 손님 | 클라이언트 |
| 아르바이트생 | 인보커 객체 |
| 주문을 받는것 | setCommand() |
| 주문지 | 커맨드 객체 |
| 주문을 주방장에게 전달하여 요리를 요청하는 것 | execute() |
| 주방장 | 리시버 객체 |
- 클라이언트는 커맨드 객체를 생성하고
- 클라이언트에서 인보커 객체 안의 setCommand() 를 호출 커맨드 객체를 넘겨준다
- 인보커 객체에서 커맨드 객체의 execute() 를 호출하면 리시버에 있는 특정 행동을 하는 메소드가 호출된다
- 이후 클라리언트에서 인보커에게 그명령을 실행시켜달라는 요청을 한다
예제 코드
이해하기 쉽게 다용도 리모컨을 커맨드 패턴으로 구현해 보겠다.
1. Command 인터페이스 정의
public interface Command {

    public void execute();

}
2. 리시버 객체(명령을 받는) 만들기
전등
public class Light {

    private String location;

    public Light(String location) {
        this.location = location;
    }

    public void on() {
    	System.out.println(location + " 전등 켜짐");
    }
    public void off() {
    	System.out.println(location +" 전등 꺼짐");
    }

}
에어콘
public class AirConditioner {


    public void on() {
    	System.out.println("에어콘 켜짐");
        }
    public void off() {
    	System.out.println("에어콘 꺼짐");
        }

}
3. 인터페이스를 상속받는 커맨드 객체 만들기
전등 켜지는 커맨드 객체
public class LightOnCommand implements Command{
    Light light;

    public LightOnCommand(Light light){
        this.light = light;
    }

    @Override
    public void execute() {
       light.on();
    }

}
전등 꺼지는 커맨드 객체
public class LightOffCommand implements Command{
    Light light;

    public LightOffCommand(Light light){
        this.light = light;
    }

    @Override
    public void execute() {
       light.off();
    }

}
에어콘 켜지는 커맨드 객체
public class AirConditionerOnCommand implements Command {

    private AirConditioner airConditioner;

    public AirConditionerOnCommand(AirConditioner airConditioner) {
        this.airConditioner = airConditioner;
    }

    @Override
    public void execute() {
       airConditioner.on();
    }


}
에어콘 꺼지는 커맨드 객체
public class AirConditionerOffCommand implements Command {

    private AirConditioner airConditioner;

    public AirConditionerOffCommand(AirConditioner airConditioner) {
        this.airConditioner = airConditioner;
    }

    @Override
    public void execute() {
       airConditioner.off();
    }


}
빈명령 슬롯을 초기화 시키는 커맨드 객체
public class NoCommand implements Command {

    @Override
    public void execute() {
        System.out.println("명령 슬롯이 초기화 되어 있지 않습니다.");

    }

}
4. 인보커 객체(커맨드 객체를 저장하는) 만들기
public class RemoteControl {
    Command[] onCommands;
    Command[] offCommands;

    public RemoteControl() {
        onCommands = new Command[6];
        offCommands = new Command[6];
        NoCommand noCommand = new NoCommand();

        for(int i=0; i<6; i++){
        onCommands[i] = noCommand;
        offCommands[i] = noCommand;
        }
        //커맨드의 각슬롯을 모두다 비어있는상태로 초기화
    }
    //원하는 슬롯에 명령 부여
    public void setCommand(int slot,Command onCommand,Command offCommand) {
        onCommands[slot] = onCommand;
        offCommands[slot] = offCommand;
    }

    //슬롯번호 눌렀을때 해당커맨드 켜기
    public void onbuttonPressed(int slot) {
        onCommands[slot].execute();
    }

    //슬롯번호 눌렀을때 해당커맨드 끄기
    public void offbuttonPressed(int slot) {
        offCommands[slot].execute();
    }
}
5. 클라이언트 객체 만들기
public class TestRemote {
    public static void main(String[] args) {
        RemoteControl remoteControl = new RemoteControl();


        Light kitchenlight = new Light("주방");
        LightOnCommand kitchenlightOnCommand = new LightOnCommand(kitchenlight);
        LightOffCommand kitchenlightOffCommand = new LightOffCommand(kitchenlight);

        Light bedroomlight = new Light("침실");
        LightOnCommand bedroomlightOnCommand = new LightOnCommand(bedroomlight);
        LightOffCommand bedroomlightOffCommand = new LightOffCommand(bedroomlight);

        AirConditioner ariConditioner = new AirConditioner();
        AirConditionerOnCommand ariConditionerOnCommand = new AirConditionerOnCommand(ariConditioner);
        AirConditionerOffCommand ariConditionerOffCommand = new AirConditionerOffCommand(ariConditioner);


        remoteControl.setCommand(0,kitchenlightOnCommand,kitchenlightOffCommand);
        //0번커맨드에는 주방의 불을 끄고 키는 명령을 심어둔다
        remoteControl.setCommand(1,bedroomlightOnCommand,bedroomlightOffCommand);
        //1번커맨드에는 침실의 불을 끄고 키는 명령을 심어둔다
        remoteControl.setCommand(2, ariConditionerOnCommand,ariConditionerOffCommand);
        //2번커맨드에는 에어콘을 키고 끄는 명령을 심어둔다

        remoteControl.onbuttonPressed(0);
        remoteControl.onbuttonPressed(1);
        remoteControl.onbuttonPressed(2);

        remoteControl.offbuttonPressed(0);
        remoteControl.offbuttonPressed(1);
        remoteControl.offbuttonPressed(2);

        remoteControl.onbuttonPressed(5);
        remoteControl.offbuttonPressed(5);

        //이후 버튼을 눌러 execute() 실행
    }
}
원하는 형태

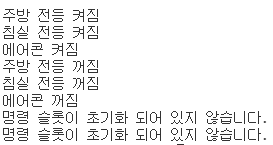
결과
마무리 정리
커맨드 패턴은 이벤트를 발생시키는 클래스를 변경하지않고 언제든지 재사용 할수 있게 해주는 디자인 패턴이다
만약 위 예제코드에서 화장실 전등을 껏다 키는 명령을 추가하고싶다면 Receiver(수신자), Invoker(발동자) 클래스만 추가,수정 한다면 간편하게 등록이 가능하다.
또한 요구사항이 캡슐화 되므로 코드중복을 방지할 수 있다.
'디자인패턴' 카테고리의 다른 글
| 추상 팩토리 패턴( Abstract Factory Pattern ) (0) | 2021.10.18 |
|---|---|
| 이터레이터 패턴( iterator Pattern ) (0) | 2021.10.18 |
| 퍼사드패턴 ( Pacade Pattern ) (0) | 2021.10.11 |
| 스테이트 패턴(State Pattern) (0) | 2021.10.05 |
| 싱글톤 패턴 (Singleton Pattern) (0) | 2021.10.05 |


